
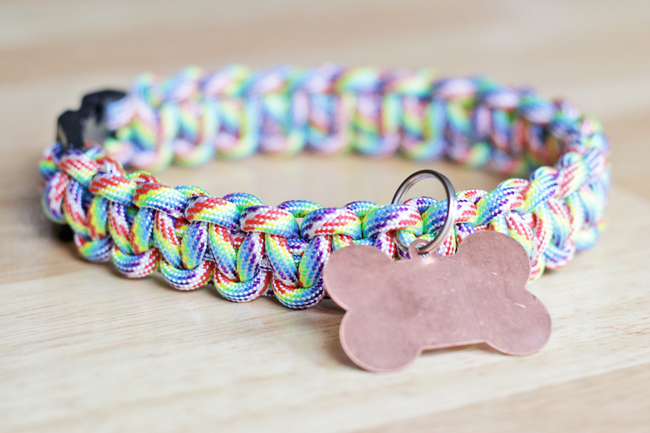
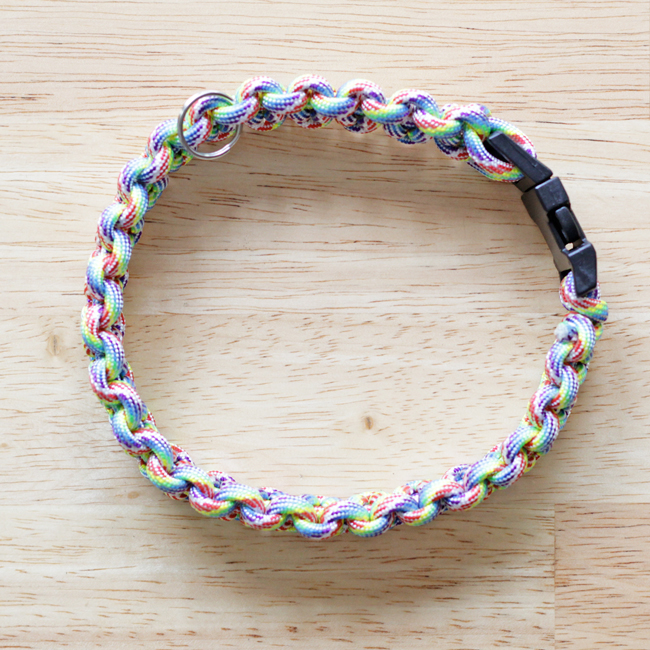
Paracord accessories are really fun and pretty easy to make once you get the hang of the knot or braid you’re trying to use. They’re good projects to do with kids, especially boys and teens, because they’re often worn by military service people, and they involve the use of a lighter, which dudes tend to think is cool (sorry to generalize 🙂 ). For today’s project, I thought making my dog a rainbow collar would be fun for St. Patrick’s Day and a good excuse to play with paracord and lighters. I also made myself a bracelet using the same technique, so even if you don’t have a brooding teen or a dog to craft for, you can do this project too.
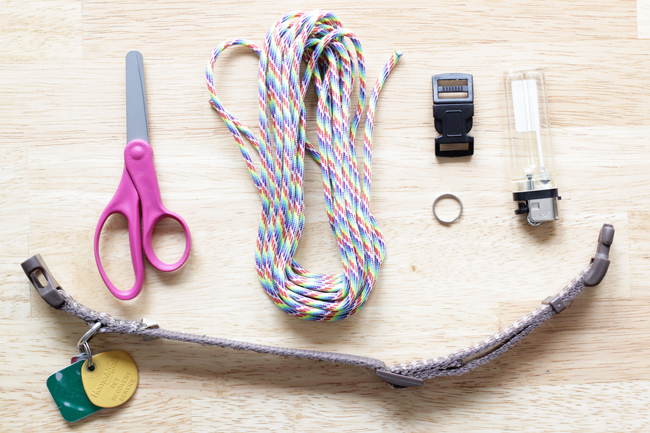
Supplies
rainbow 550 paracord
side release buckle
lighter
scissors
small key ring
measuring tape (optional)
painter’s tape (optional)
Directions
The formula I use to determine the length of the cord is 1 foot of cord for each inch of the collar. Then add a foot for good measure. So, for an 8 inch collar (I have four Chihuahua’s), I would cut 9 feet of cord.
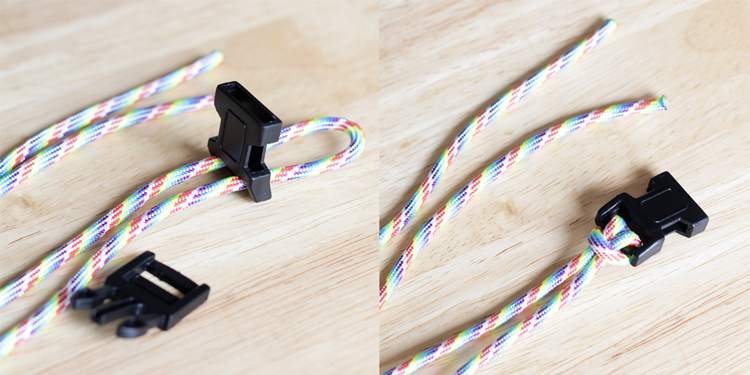
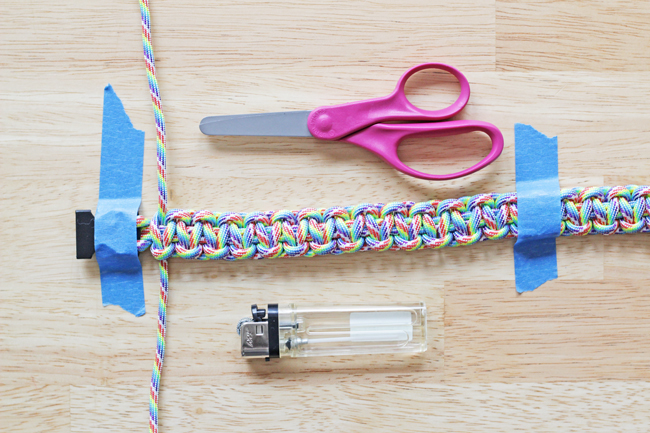
Fold your paracord exactly in half and thread it through one end of the slide release buckle. Flip the folded end over the buckle it’s threaded through and tighten. This is what it should look like:
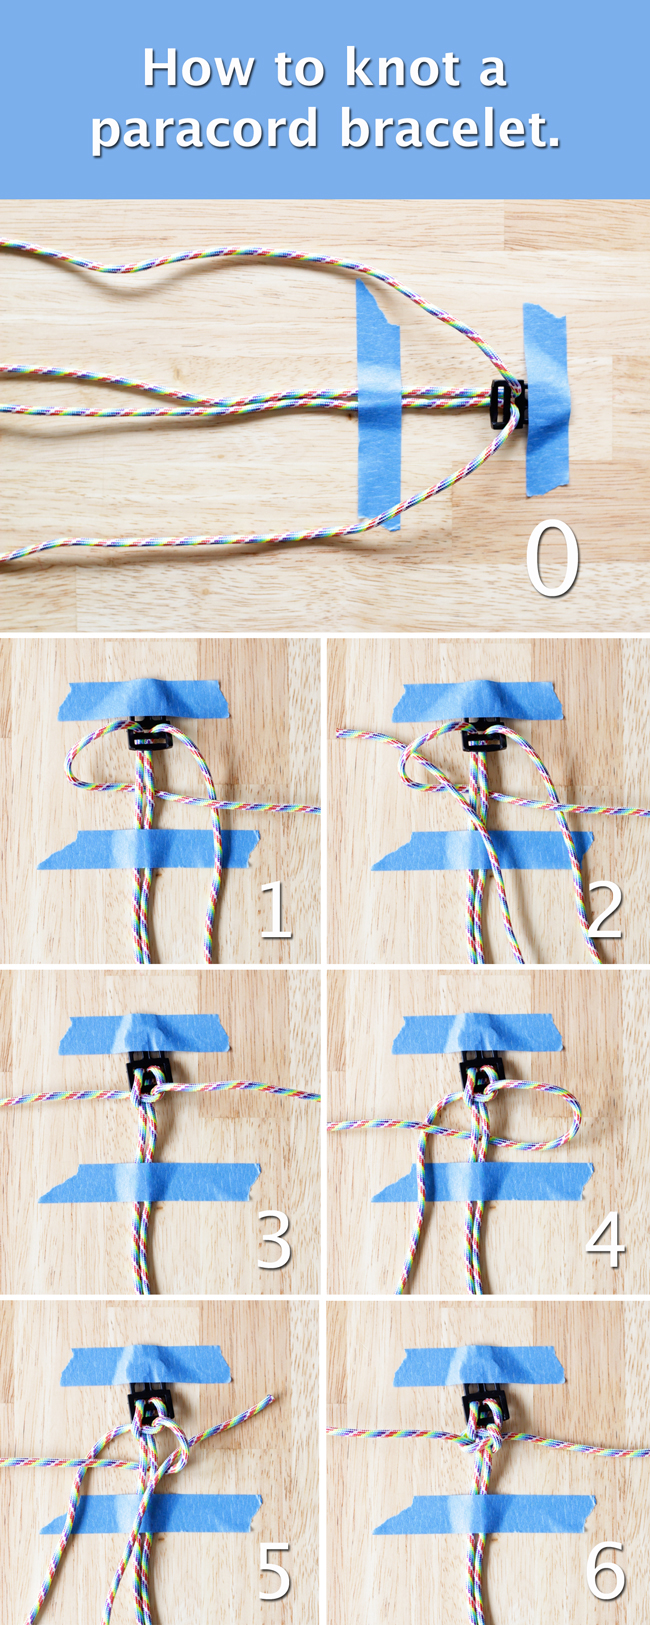
Using your dog’s existing collar as a guide, or a measuring tape if you want to be precise, thread the second end of the slide release buckle onto the two open ends of the paracord, letting the second end rest at the spot at which it will fit your dog, as shown.

Tape down the second end as well as the middle of the collar with some painter’s tape to help keep it at the correct length. You can skip the taping if you’re confident you can keep the buckle in place by itself.
I’ve got two things to keep in mind as you go. One, if you’re making a dog collar, add your key ring to one knot wherever you like for attaching your dog’s tags to the collar. Also remember to tighten each knot fully before moving on to the next knot in your project.
When you have knotted all the way down your bracelet, cut the excess paracord from the last knot and burn the raw ends to prevent fraying.
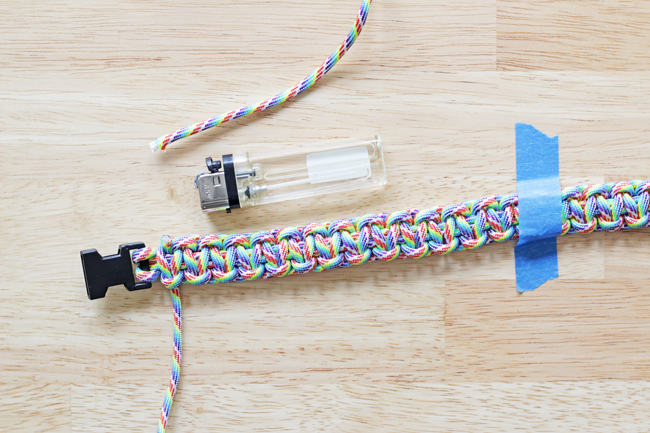
If you did the collar, now you can add your dog’s tags to the ring to complete it.
Tutorial brought to you by : www.handsoccupied.com
Leave a Reply