
It wasn’t that long ago that hubby and I would actually pack an extra suitcase of books when we went on vacation. Yep. Seriously. Now we can take 2000 books with us (each) in the palm of our hand. Isn’t technology amazing? I have to say, I was excited when my Kindle arrived, but I wasn’t so excited when I figured out that a decent case for my new gadget cost more than the gadget itself. Being the cheap ass, uh…smart shopper I am, I determined I would make my own. A quick check on Ravelry revealed a number of excellent pattern choices and the usual search on Etsy turned up some wonderful budget friendly options.
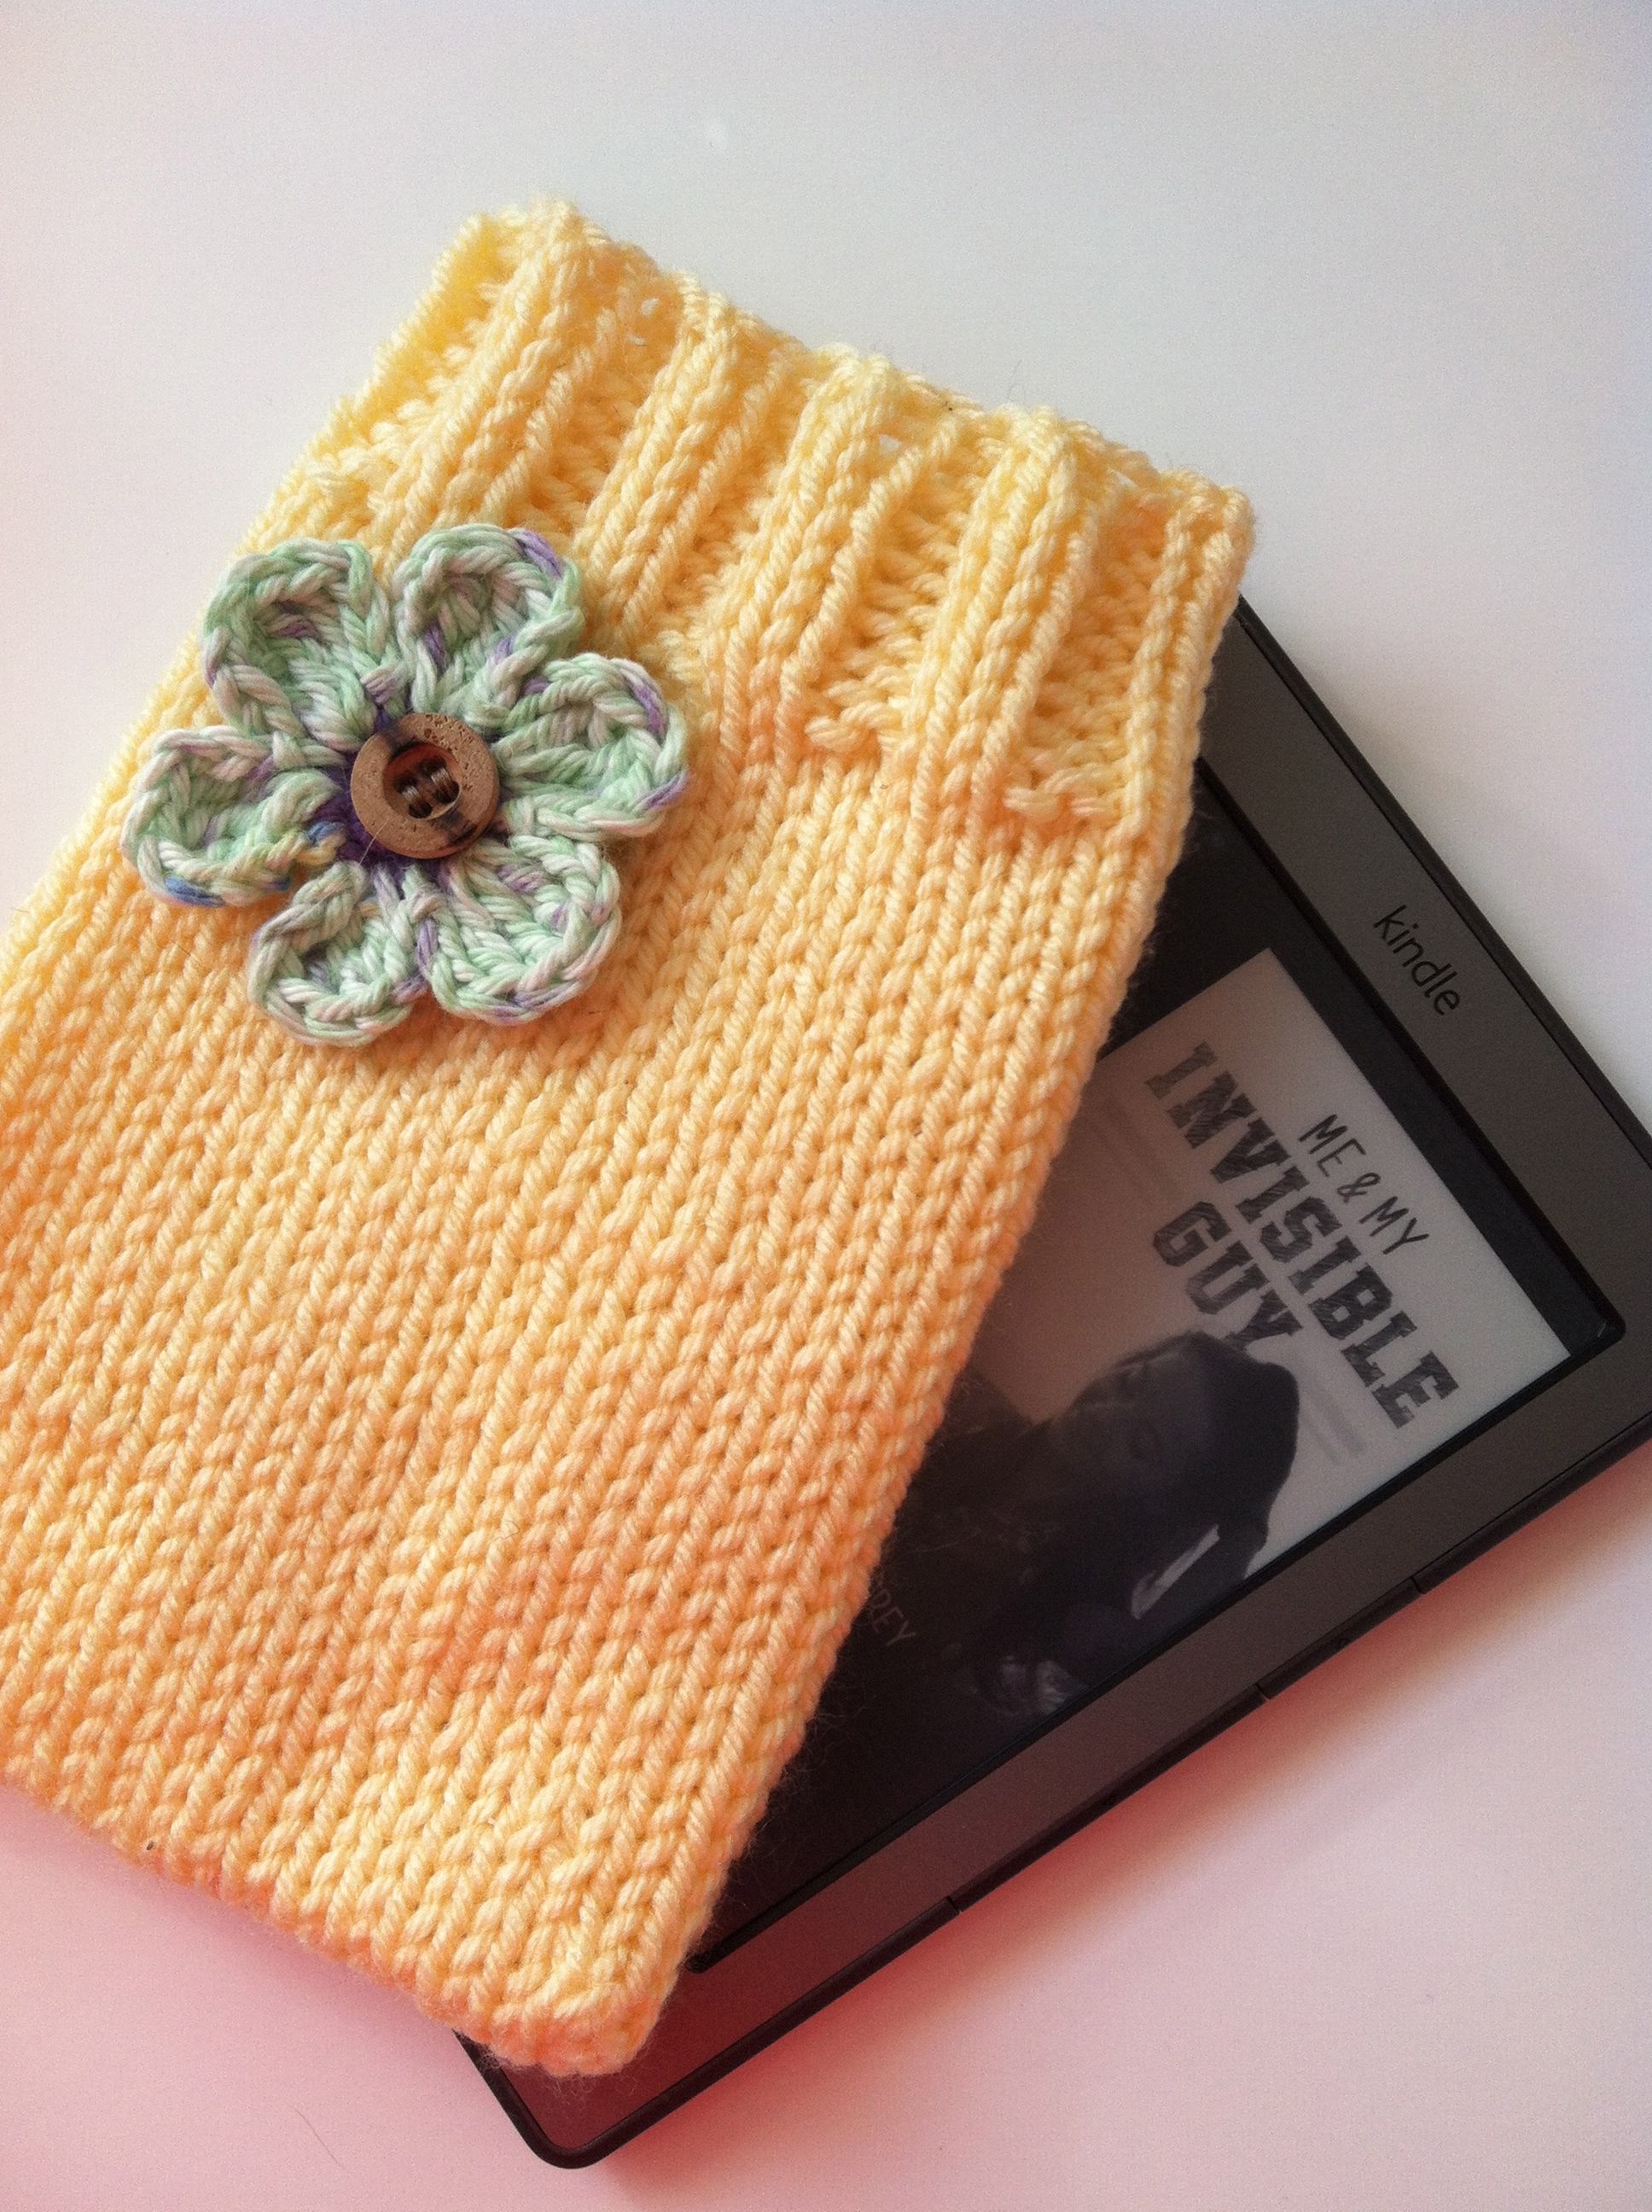
After much musing, I picked this pattern.
It was well written and I finished the project in a single evening of prime time TV watching. The toughest part, for me, was grafting the bottom together to make a seamless bottom. Kitchner stitch has always sent me screaming from the building. I just never quite “got it.” Even with hands on lessons, I failed to grasp the concept. If you find yourself in the same boat, check out the tutorial below. This is the one that finally made it possible for me to master this stitch. (As it turns out, isn’t so hard after all;-)
KITCHNER STITCH:Okay. Sit down someplace quiet with a good light source, your knitting and a tapestry needle. You can thread the tapestry needle with a length of yarn that’s not attached to the knitting and weave it in later, but ideally you will have left a tail on one of the pieces of knitting that’s at le
ast twice as long as the finished join will be. From experience, I’ve found that the results are best if the tail is coming from the piece on the needle furthest from me when I start.
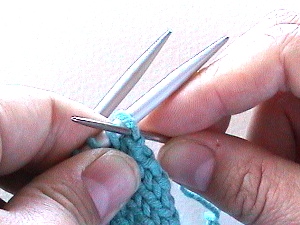
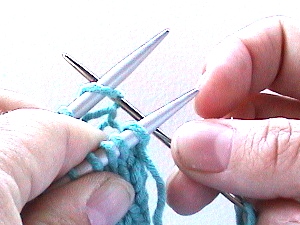
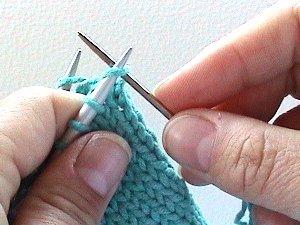
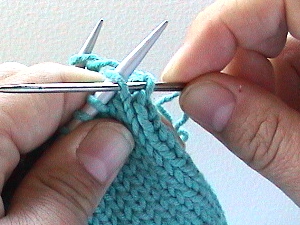
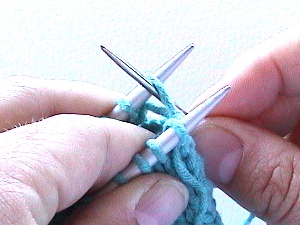
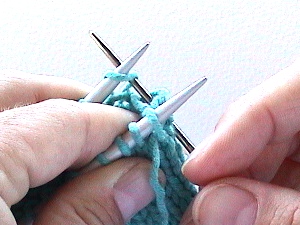
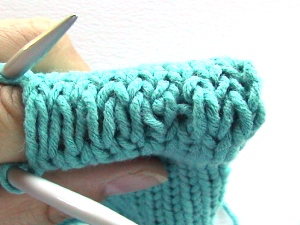
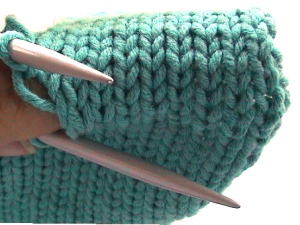
Hold the needles parallel with the tips pointing in the same direction andthe wrong (purl) sides facing inwards.Now you’ll need to “set up” for grafting by performing the following two steps one time:Insert the threaded tapestry needle into the first stitch on the needle closest to you as if to purl and pull it through, leaving the stitch on the needle.Then insert the needle into the first stitch on the back needle as if to knit, leaving the stitch on the needle. Pull the yarn through.These first two steps are preparatory and are only done once.Now let’s get down to some serious kitchenering — the following four steps are the ones you will repeat until you’ve worked every stitch on the needles. I usually chant to myself “knit, purl — purl, knit” while grafting and you’ll soon see why.Step 1Insert the needle into the first stitch on the front needle as if to knit, while slipping it off the end of the needle.Step 2Insert the needle into the next stitch on the front needle as if to purl, but this time, leave it on the needle. Gently pull the yarn through.Step 3Insert the needle into the first stitch on the back needle as if to purl, and slip it off the end of the needle.Step 4Insert the needle into the next stitch on the back needle as if to knit, and leave it on the needle. Pull the yarn through.Repeat steps 1-4 over and over again. After you’ve worked a couple of inches, pause [being sure to complete step 4 so you’ll know where to begin again] and tighten up the stitches using the end of the tapestry needle to tug at each loose loop in turn, working from the beginning of the join towards the last stitches worked. I find I get a nicer final result when I pull the yarn lightly through the stitches during the process of grafting and then adjust the tension on the yarn to match the gauge of the knitting as closely as possible afterwards.So this…becomes this.Pure magic!Keep repeating steps 1-4, pausing to tighten up the stitches now and then until all the stitches are worked. The last two stitches remaining on the needle will require you to perform step 1 then go directly to step 3.

Leave a Reply